Gentle Giant Ltd has opened the pre-order for their Walking Dead Sophia Stalker Walker Zombie Mini Bust. Follow the above link to get yours reserved now!
↧
Gentle Giant Ltd: Sophia Stalker Walker Zombie Mini Bust
↧
Happy birthday Mr Hornby
In case you didn’t know it, today is Frank Hornby’s birthday.
![]()
![]()
![]()
![]()
![]()
![]()
↧
↧
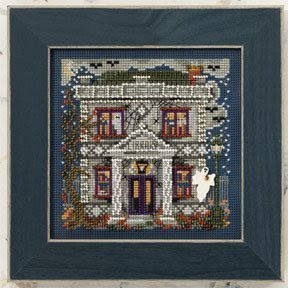
My Haunted Library Cross-Stitch Shadwobox Picture

Haunted Library - Mill Hill Buttons & Beads Cross-Stitch Kit #MH14-0201
One of my all time favorite holidays is Halloween. I think it's the large number of creatures that you can make for this one holiday that draws me to it. So, of course, I was drawn to some of the Halloween cross-stitch kits I saw from Mill Hill.
Like the other Mill Hill - Buttons & Beads Series patterns I had bought the Haunted Library kit included the pattern, embroidery thread, perforated paper, beads, ghost button, 2 needles and instructions.
The Haunted Library pattern uses full counted cross-stitch and outline stitching as well as beads and buttons for emphasis and depth. The pattern also calls for certain areas of the perforated paper to be left untouched as the background. In this case they were leaving sections of the dark blue perforated paper background untouched.

I, once again, decided to frame my finished cross-stitch picture in a 5" by 5" white shadow box frame that is 1 1/2" deep and can stand on it's own (like the picture at the top of this post) or with its back picture stand (like the picture above) as I've been really happy with the way all my other cross-stitch shadowbox pictures have come out.
I also decided to once again utilize the rectangular wood frame jig that my darling husband built for me(pictured above) that I could tape the edges of my perforated paper to. The wood frame jig is a rectangular embroidery hoop of sorts, but without bending the perforated paper. He had made it out of 1/2" x 1" pine wood strips with an adjustable center strip that I used for this 5 x 5 square design.
I had learned from previous mistakes that I needed to draw diagonal lines to locate the exact center of the perforated paper as in the last perforated paper cross-stitch picture I had done was slightly off center by a few holes which caused a problem with inserting the needles in the holes along one of the edges of my frame. So, I drew a diagonal line across each corner to get the center point of the perforated paper.
I had also run into a slight problem with one of the perforated paper cross-stitch pictures I had previously created with the beads along the edge causing a problem when framing so this time I also drew squares on the perforated paper to show me where the 5" x 5" square was. Plus, I knew I wanted to square my picture so I needed to know where to end my stitching.

While the end results of this design were wonderful some things in the kit and in the instructions could be improved upon so I'd like to offer the following constructive suggestions:
The cross-stitch chart was in black and white as was the floss color code and symbol key. Both were easy to read and very clear. While I had no problem with the chart and keys I did have a problem with the way the DMC floss was presented. All of the floss was tied together in one big knot so you had to separate the floss pieces yourself, sort them, and try to interpret which color belonged to which floss # and symbol key on the color chart. If you only have a few colors to deal with this isn't a problem. However, if you have several different colors of say gray to choose from that are close in color then interpreting the chart can be tricky. You may assign the wrong color to the wrong symbol if the colors are too closely aligned.
As I have done with other cross-stitch kits I've completed I had to design my own thread color sorter and symbol key. I took a piece of thin cardboard and cut a 1" x 9" long rectangular piece out to use as a thread sorter. I then punched 15 holes in my cardboard strip in which to tie each of the different colors. Just above the hole I wrote the DMC floss # and just below the hole I added the respective cross-stitch symbol. I then inserted the floss threads that went with that # and symbol through the hole and tied them in a loose knot. This kit could be much improved if a thread sorter with respective #'s and symbols was provided.
The beads were contained within two small ziploc bags which was fine. However, when several different beads of similar color or size are included within the bags it can be very difficult to distinguish between the colors or between the petite and regular size beads. Labeling the ziploc bags as to which bead number they contained would enhance this kit and allow you to tie the bead # to the symbol number on the charts.
The pattern called for certain areas of the perforated paper to be left untouched as the background like the picture shown below:
However, I don't like seeing the different perforated sections in the background and opted instead to finish all of the background with a dark teal blue DMC embroidery floss color that closely matched the color of the dark teal blue perforated paper and would be sewn as a half-cross stitch using two strands of the floss. I had decided to square the edges of my picture and also decided to add two rows of the dark teal blue floss around all the edges to make sure the perforated paper would not be visible once my cross stitch picture was framed in its' shadowbox.
Instead of mounting my picture on foam as I had done with my previous cross-stitch I opted instead to mount my Haunted Library on hard chipboard.
My results with the totally finished background, square edges, and hard chipboard is shown below:

The kit had included a white ghost button that was cute so I decided to include it in my final design.
Despite the relatively small issues I had encountered with the kit I was thrilled with the way my Haunted Library turned out. There is a lot going on in a very small cross-stitch picture and it is amazing to see all the details. The beading and stitching around the front door really creates a 3-dimensional effect for the doorway.
It took me 32 hours to complete this picture including the framing. As always, my comments are meant to be constructive to enable future purchasers to benefit from my experience and to enhance their ability to create a wonderful little cross-stitch design.
Posted by Linda Walsh Originals- "Doll Patterns for Grown-up Girls!"
Linda Walsh Originals E-Patterns - "Instant Download E-Patterns for Grown-up Girls!"
Linda Walsh Originals Dolls - "Handmade Dolls & Crafts for Grown-up Girls!"

↧
LEGO Series 10 Mini Figure Bio & Mr. Gold Finder Database
LEGO has put up Bios of each mini figure … And in series 10, they have added a CHASE Mr. Gold (not made of real gold) … you can go to the database to add yours or see how many more are floating out there … I see Hawaii is there but no Madagascar yet! [...]
↧
The Royal Teas
The Royal Teas, which were to be released for Toycon UK, have finally arrived with Mr. Matt JOnes (only about a month late). All of the pre-orders and reserved pieces have been sent out. There are still some left, around 64 of the total run of 200 pieces, and can be purchased for £15.00 each [...]
↧
↧
Pic of the Day > Marvel Mighty Muggs! by SnowHulk
Marvel Mighty Muggs! by SnowHulk Submit your Flickr photos to Poe Ghostal’s Pic of the Day!
↧
Worlds Collide Tonight When the ‘Toy Hunter’ Meets the Toy Guru
 Masters of the Universe is the focus on tonight’s episode of “Toy Hunter.” Show host Jordan Hembrough needs Scott “Toy Guru” Neitlich’s help identifying a vintage MOTU figure on the Travel Channel program. Check your local listings! http://www.travelchannel.com/tv-shows/toy-hunter
↧
Jefferson Rubber Division Acquires Astro Pet Toys
Maker of pet toys adds to lineup of popular, American-made products Worcester, MA—Ruff Dawg Pet Toys, a division of Jefferson Rubber Works of Worcester, MA, has announced the acquisition of Astro Manufacturing Co., also of Worcester, and its line of Astro Pet Toys. The acquisition adds to Ruff Dawg’s unique and popular array of American-made products. “We are incredibly ...
↧
Gaming Partners International Corporation To Introduce New Products at the Upcoming G2E Asia Trade Show in Macau
[PR Newswire] - LAS VEGAS, May 15, 2013 /PRNewswire/ -- Gaming Partners International Corporation (NASDAQ: GPIC), a leading provider of casino currency and table game products worldwide, announced today that it will ...
↧
↧
sling it everywhere!
Have you noticed slingshots popping up everywhere we turn? Is it just me? They’re adorable, and very retro-cool. Yet, my first thought was: oh no, not a weapon for my kid! But, I’m actually coming around to the idea. It’s a big leap away from a toy gun. More importantly, you can shoot some pretty [...]
↧
Sweeten up your day with Sonico
Sonico continues her bid to become queen of PVC with yet another upcoming release, this time a very colorful "Sweets & Bikini version" from Arcadia. While it's hard to dislike any Sonico, this type of figure is exactly the kind that makes me love the majority of her releases. Colorful, loads of accessories, and Sonico as sexy as ever, this looks like a must-have for fans.
As usual, Sonico's distinctive eyes are a huge draw, but the little details like her necklace are nice additions to add a bit of flair as well. Though you'd think with such a tray of sweets around her kitties would be more interested in food, at least one seems to be following the thoughts of a number of us and paying more attention to getting that top off!
To her credit, Sonico doesn't seem to mind the attention a bit, so feel free to drop the ¥9,270 on her October arrival.
[ Pre-order at HobbyLink Japan | Hobby Search | AmiAmi | CD Japan | J-List ]

↧
Build-A-Bear Workshop Meets Bikini Bottom with New SpongeBob SquarePants Collection
Build-A-Bear Workshop, the interactive entertainment retailer of customizable stuffed animals, announced a new relationship with Nickelodeon to bring the animated series, SpongeBob SquarePants, to Build-A-Bear Workshop. Beginning May 17, the company will offer make-your-own SpongeBob and Patrick at Build-A-Bear Workshop stores throughout North America and online at buildabear.com. SpongeBob’s Bikini Bottom friends Sandy Cheeks and Gary the Snail will [...]
↧
Hot Toys 1/6th Scale DX-14 Batman The Joker (Mime Version)
The first DX series The Joker Collectible Figure from Batman (1989) has received high praise from collectors. To follow up on this classic Batman movie directed by Tim Burton, Hot Toys is proud to present the 1/6th scale The Joker (Mime Version) Collectible Figure. Toy Garden and Toywiz Malaysia will start taking preorder for this [...]
↧
↧
It’s Karatti and the Fighting Foe Men Day
Order here, discuss below! I’ll confess I’m not even sure I’d ever heard of Karatti until the MOTUC version was announced. He seems to have a pretty cool design, although I’m getting a bit tired of the Trap Jaw legs (the side-to-side ankle action never seems to work on them). As for the Fighting Foe [...]
↧
2013 Designer Toy Awards Nominations Close Today
Today, May 15th 2013, is the final day of nominations for the 3rd Annual Designer Toy Awards. Open to any releases from 2012 or artists/brands active in the same year, you can make all of your nominations before the end of day right here. (And thanks to the person who nominated Plastic and Plush)
↧
Make it so: Diamond Select adds Picard to Star Trek line
Diamond Select's next Star Trek Select figure has been revealed, and after two releases from the original series, we're getting one from The Next Generation in Jean-Luc Picard. Picard's pose has him with phaser in hand onboard a Borg ship, with a fallen Borg at his feet on the base. The image you see above is the prototype, so while I'm not exactly sold on the face from this angle, they have some time to refine it still. According to Diamond Select's press release, the figure will have some limited articulation and will feature Picard in his outfit from the series. Never really was keen on the movie designs, myself ...
The Star Trek Select Picard is set for a release this fall. And after that, the wait for Riker and Worf begin. Or at least that's what we can hope for, right?

↧
A Brave look for a princess?
Disney unveiled Merida last week, ready for her induction into the Princess hall of fame and with a brand new makeover...
![]()
![]()
![]()
![]()
![]()
![]()
↧
↧
Tomopop Review: Alter's Jude Mathis
It's not every day that we see a boy figurine like Jude Mathis. However the Tales franchise and ALTaiR have a good history of making it happen. First to capture our hearts was Yuri Lowell, followed by Flynn Scifo and let's not forget about Luke Fon Fabre. So, it was no surprise that when Alter announced that pre-orders were available for Jude Mathis that he sold fast.
I managed to be one of the lucky ones to get my hands on Jude. Hit the jump if you want to check out my impressions on him and see what he is all about.

↧
Nominations for Annual Pink Power Mom Program Now Open
The Pink Power Mom Program, now in its 7th year, announced the call for this year’s nominations starting on Mother’s Day, May 12. Every year, Kids II recognizes and rewards eight women for their fight against breast cancer and honors these incredible women as Pink Power Moms. The Pink Power Moms are selected due to [...]
↧
Susie Ghahremani Signing at Leanna Lin’s Wonderland
Here’s Susie Ghahremani signing a copy of ‘What Will Hatch?’ for an adorable fan. Susie’s first Los Angeles book signing took place during the opening reception of Supah Mashup Art Party at Leanna Lin’s Wonderland. I think Leanna Lin’s may … Continue reading →![]()

↧