The Toy Industry Association has launched an industry-wide campaign to stress the important role that toys and play have in the healthy development of children. The Genius of Play campaign includes awareness of facts: for example, pediatricians recommend children spend at least one hour a day engaged in open-ended play, and that children who have [...]
TIA Spotlights Value of Toys and Play in a Child’s Healthy Development in New Campaign
↧
↧
Pop Culture Shock Collectibles Debuts Batman Wall Statue

↧
Tomopop Review: DST's Marvel Select Amazing Spidey 2 Spider-Man
The Amazing Spider-Man 2 was the somewhat lukewarm follow-up to Sony's Spider-Man reboot. The film notably improved on Spider-Man's costume, giving movie-goers something closer to what they were used to, while jumping all over the board with everything else.
Merchandise-wise, however, collector-level offerings were surprisingly scarce. Sure, a few figures popped up in the overly expensive 1/6-scale but, for the most part, the line just didn't get the same big movie treatment as the original trilogy.
Diamond Select Toys, which was unable to get the reference materials to design an Electro figure, wound up releasing a new Spider-Man (based on the ASM2 look) in several different configurations. (Although there was no metallic version like last time.) While the Marvel Select ASM1 Spider-Man was pretty cool, DST apparently decided to go in a very different direction with the "sequel" to its figure. How does it stack up against the previous one?
Full review after the jump.

↧
McFarlane Toys WWE 'Stone Cold' Steve Austin Statue

↧
Toys for Tots collects toys for needy children
Toys For Tots spent the afternoon in Roanoke gathering toys to brighten Christmas for kids. A truck was parked in front of the Wal-Mart at Clearbrook Village in Roanoke County to collect toys that will be distributed to children in need during this holiday season.
↧
↧
IDW Comics Angry Birds Transformers #1 Full Preview
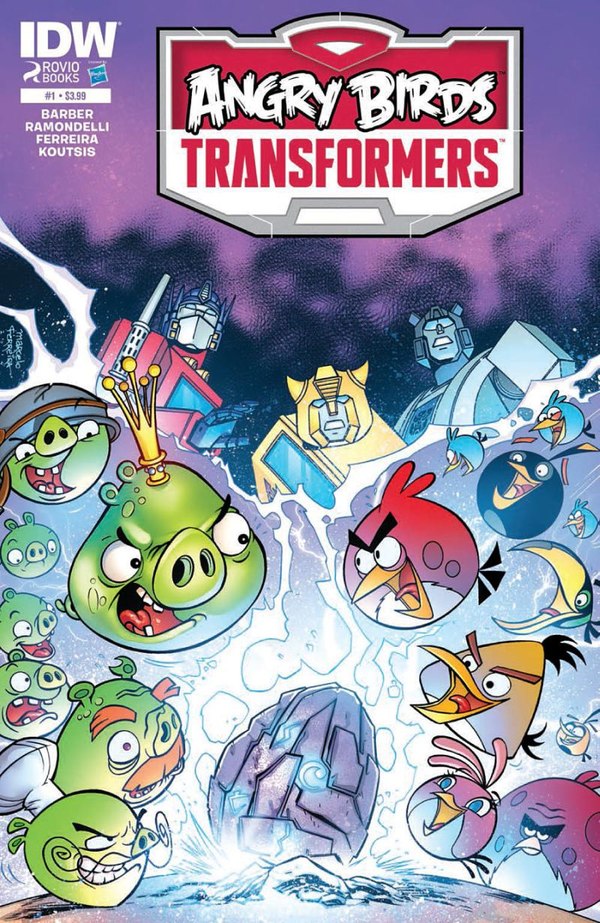 ComicBookResources has gotten an advance preview of the first issue of Angry Birds Transformers, shipping to shops this Wednesday, November 26th. Our first look at the finished issue, these preview pages give us an overview of how the worlds of the Transformers and Angry Birds collided. Keep reading to have a look at the preview pages, and be sure to come back this week when we'll be bringing you the first review for this title!
↧
Kingdom Doll Brunel
Kingdom Doll's newest 16" resin fashion doll, Brunel, was named for Isambard Kingdom Brunel who lived from 1806-1859 in Great Britain. He was an accomplished mechanical and civil engineer involved in the building of dockyards, railways, steamships, bridges and tunnels.
![]() Luckily the doll looks nothing like the man.
Luckily the doll looks nothing like the man.
![]()
![]()
![]()
Her choker is woven of black and gold beads with a magnetic closure by Mike Austin.
The crowning glory is a most dramatic tall wig of mahogany over blended silver and black by Ilaria Mazzoni.
This is the last doll who will be made using the Novantae sculpt and I am thrilled to add her to my collection.
![]()
![]()


Brunel wears a long silk coat dress with a ruffled peplum in the back. Under her coat are black sequined leggings and black short boots trimmed in metallic gold.

Her choker is woven of black and gold beads with a magnetic closure by Mike Austin.
The crowning glory is a most dramatic tall wig of mahogany over blended silver and black by Ilaria Mazzoni.
This is the last doll who will be made using the Novantae sculpt and I am thrilled to add her to my collection.
↧
How Disney Turned ‘Frozen’ Into a Cash Cow
 Or: Why an Elsa dress is like prescription drugs.
↧
Toys R Us pulls 'Breaking Bad' dolls
NEW YORK - Toys R Us is pulling its four collectible dolls based on characters from AMC's hit series "Breaking Bad" after taking heat from a Florida mom who launched a petition campaign last week.
↧
↧
Mattel Disney Planes Fire & Rescue: ‘Ol Jammer Be Jammin’ at The Fusel Lodge Fire Alarm
Thanks for the nice pics, “John H!” The Fusel Lodge Fire Alarm 4-Pack is a Target exclusive. Pulaski, ‘Ol Jammer & Cad Spinner (plus Fire Fighter Dusty). As expected, John notes, the grill, fenders, sidestep and hat are plastic. The bodu is diecast but as mattel has figured out – it’s lightweight and thin but somehow […]
↧
Toys for Toga campaign, Saratoga County Restaurant Week kick off
SARATOGA SPRINGS The second annual Toys for Toga campaign was officially launched Monday with a bin pickup event and celebration.
↧
Occupations Group Nurses and Chef Cut and Sew Kits and Handmade Ornaments Sets

Occupational Group Cut and Sew Kit - Creates Four 2 1/2" by 3 1/2" Cotton Fabric Nurse and Chef Doll Ornaments
To buy our cut and sew Occupational doll ornaments group kit please CLICK HERE.
To buy our handmade machine stitched cut and sew Occupational doll ornaments group please CLICK HERE.
To buy our blanket stitch embroidered edges cut and sew Occupational doll ornaments group please CLICK HERE.
Cut and Sew Kit Contents: Four (4) pieces, as shown above, consisting of one each of the Occupational Group cut and sew cotton fabric piece designs and instructions for finishing the ornaments one of two different ways. Kit DOES NOT include sewing thread, poly-fil, warm and natural or batting, and DMC color coordinated embroidery floss needed to create the ornaments one of two different ways.
Instructions included for finishing the ornaments via machine stitching as shown in the picture at the top of the collage shown above. Kit does not include poly-fil, sewing thread, and color coordinated DMC embroidery floss that you will need to buy to finish the cut and sew ornaments.
Or, blanket stitch embroider the edges of the ornaments as shown in the picture at the bottom of the collage shown above. Kit includes how-to tutorial for blanket stitching. Kit does not include warm and natural or batting, and color coordinated DMC embroidery floss that you will need to buy to finish the cut and sew ornaments this way.
The Occupational cut and sew kit contains 1 fabric piece for each of the following cut and sew custom cotton fabric doll ornaments:
1) Chef Andy Cut and Sew Doll Ornament
2) Bridget Nurse For All Seasons Cut and Sew Doll Ornament
3) Nurse Hannah Anna Cut and Sew Doll Ornament
4) Janice Nightingale Cut and Sew Nurse Doll Ornament

Cut and Sew Kit Finishing Instructions Per Piece
Additional Supplies Needed -Poly-fil, Sewing Thread, and Color Coordinating DMC Embroidery Floss For The Hanger For Each Piece.
1) Cut the two pieces along the dotted lines.
2) Place right sides together and sew 1/8” away from outer doll line leaving a small opening on the bottom for turning.
3) Trim seam and clip edges.
4) Turn right side out and stuff with poly-fil.
5) Hand sew small opening closed with the sewing thread.
6) Add a hanger to the top of the piece with 6 strands of the color coordinating DMC embroidery floss.
Copyright © 2004-2015 Linda Walsh Originals—Designs by Linda Walsh - Kit and Contents For Personal Use Only.

Alternative Method #1 For Blanket Stitch Finishing Each Piece Along The Edges:
Additional Supplies Needed - Warm and Natural or Batting, and Color Coordinating DMC Embroidery Floss For Each Piece
1) Cut the two pieces along the dotted lines.
2) Using the front doll piece as a guide cut two pieces out of warm and natural or batting.
3) Place the two doll pieces wrong sides together and then insert the warm and natural or batting pieces in between the two pieces and pin along the sides to hold.
4) Trim the edges so the pieces and warm and natural or batting outer edges are even.
5) Blanket stitch 1/8” - 1/4” away from outer edges with 6 strands of color coordinating DMC embroidery floss.
6) Add a hanger to the top of the piece with 6 strands of color coordinating DMC embroidery floss.
Copyright © 2004-2015 Linda Walsh Originals—Designs by Linda Walsh - Kit and Contents For Personal Use Only

↧
Hawk Family Group Cut and Sew Kit and Handmade Ornaments Sets

Hawk Family Group Cut and Sew Kit - Creates Eleven 3 1/2" by 3 1/2" Cotton Fabric Stump Doll Ornaments
To buy our cut and sew Hawk Family doll ornaments group kit please CLICK HERE.
To buy our handmade machine stitched cut and sew Hawk Family doll ornaments group please CLICK HERE.
To buy our blanket stitch embroidered edges cut and sew Hawk Family doll ornaments group please CLICK HERE.
Cut and Sew Kit Contents: Eleven (11) pieces, as shown above, consisting of one each of the Hawk Family Group cut and sew cotton fabric piece designs and instructions for finishing the ornaments one of two different ways. Kit DOES NOT include sewing thread, poly-fil, warm and natural or batting, and DMC color coordinated embroidery floss needed to create the ornaments one of two different ways.
Instructions included for finishing the ornaments via machine stitching as shown in the picture at the top of the collage shown above. Kit does not include poly-fil, sewing thread, and color coordinated DMC embroidery floss that you will need to buy to finish the cut and sew ornaments.
Or, blanket stitch embroider the edges of the ornaments as shown in the picture at the bottom of the collage shown above. Kit includes how-to tutorial for blanket stitching. Kit does not include warm and natural or batting, and color coordinated DMC embroidery floss that you will need to buy to finish the cut and sew ornaments this way.
The Hawk Family cut and sew kit contains 1 fabric piece for each of the following cut and sew custom fabric doll ornaments:
1) Tom A. Hawk Cut and Sew Doll Ornament
2) Toni E. Hawk Cut and Sew Doll Ornament
3) Dapper Devil Shamus Hawk Cut and Sew Doll Ornament
4) Cousin Hillary's Secret Hawk Cut and Sew Doll Ornament
5) Penelope Pinhead Hawk Cut and Sew Doll Ornament
6) Henrietta Hawk Cut and Sew Doll Ornament
7) Cousin Reginald Reggie Pinhead Hawk Cut and Sew Doll Ornament
8) Tangerine Lilly Hawk Cut and Sew Doll Ornament
9) Wild Irish Rose Hawk Cut and Sew Doll Ornament
10) Ditsy Daisy Hawk Cut and Sew Doll Ornament
11) Devilish Cousin Andy Hawk Cut and Sew Doll Ornament

Cut and Sew Kit Finishing Instructions Per Piece
Additional Supplies Needed -Poly-fil, Sewing Thread, and Color Coordinating DMC Embroidery Floss For The Hanger For Each Piece.
1) Cut the two pieces along the dotted lines.
2) Place right sides together and sew 1/8” away from outer doll line leaving a small opening on the bottom for turning.
3) Trim seam and clip edges.
4) Turn right side out and stuff with poly-fil.
5) Hand sew small opening closed with the sewing thread.
6) Add a hanger to the top of the piece with 6 strands of the color coordinating DMC embroidery floss.
Copyright © 2004-2015 Linda Walsh Originals—Designs by Linda Walsh - Kit and Contents For Personal Use Only.

Alternative Method #1 For Blanket Stitch Finishing Each Piece Along The Edges:
Additional Supplies Needed - Warm and Natural or Batting, and Color Coordinating DMC Embroidery Floss For Each Piece
1) Cut the two pieces along the dotted lines.
2) Using the front doll piece as a guide cut two pieces out of warm and natural or batting.
3) Place the two doll pieces wrong sides together and then insert the warm and natural or batting pieces in between the two pieces and pin along the sides to hold.
4) Trim the edges so the pieces and warm and natural or batting outer edges are even.
5) Blanket stitch 1/8” - 1/4” away from outer edges with 6 strands of color coordinating DMC embroidery floss.
6) Add a hanger to the top of the piece with 6 strands of color coordinating DMC embroidery floss.
Copyright © 2004-2015 Linda Walsh Originals—Designs by Linda Walsh - Kit and Contents For Personal Use Only

↧
↧
Eggs Muffs Group Cut and Sew Kit and Handmade Ornaments Sets

Egg Muffs Group Cut and Sew Kit - Creates Four 2 1/2" by 3" Cotton Fabric Stump Doll Ornaments
To buy our cut and sew Egg Muffs doll ornaments group kit please CLICK HERE.
To buy our handmade machine stitched cut and sew Egg Muffs doll ornaments group please CLICK HERE.
To buy our blanket stitch embroidered edges cut and sew Egg Muffs doll ornaments group please CLICK HERE.
Cut and Sew Kit Contents: Four (4) pieces, as shown above, consisting of one each of the Egg Muffs Group cut and sew cotto fabric piece designs and instructions for finishing the ornaments one of two different ways. Kit DOES NOT include sewing thread, poly-fil, warm and natural or batting, and DMC color coordinated embroidery floss needed to create the ornaments one of two different ways.
Instructions included for finishing the ornaments via machine stitching as shown in the picture at the top of the collage shown above. Kit does not include poly-fil, sewing thread, and color coordinated DMC embroidery floss that you will need to buy to finish the cut and sew ornaments.
Or, blanket stitch embroider the edges of the ornaments as shown in the picture at the bottom of the collage shown above. Kit includes how-to tutorial for blanket stitching. Kit does not include warm and natural or batting, and color coordinated DMC embroidery floss that you will need to buy to finish the cut and sew ornaments this way.
The Egg Muffs cut and sew kit contains 1 fabric piece for each of the following cut and sew custom cotton fabric doll ornaments:
1) Tom A. Hawk Cut and Sew Doll Ornament 2
2) Toni E. Hawk Cut and Sew Doll Ornament 2
3) Nancy Dew Drop Cut and Sew Doll Ornament
4) Spike A Peak Cut and Sew Doll Ornament

Cut and Sew Kit Finishing Instructions Per Piece
Additional Supplies Needed -Poly-fil, Sewing Thread, and Color Coordinating DMC Embroidery Floss For The Hanger For Each Piece.
1) Cut the two pieces along the dotted lines.
2) Place right sides together and sew 1/8” away from outer doll line leaving a small opening on the bottom for turning.
3) Trim seam and clip edges.
4) Turn right side out and stuff with poly-fil.
5) Hand sew small opening closed with the sewing thread.
6) Add a hanger to the top of the piece with 6 strands of the color coordinating DMC embroidery floss.
Copyright © 2004-2015 Linda Walsh Originals—Designs by Linda Walsh - Kit and Contents For Personal Use Only.

Alternative Method #1 For Blanket Stitch Finishing Each Piece Along The Edges:
Additional Supplies Needed - Warm and Natural or Batting, and Color Coordinating DMC Embroidery Floss For Each Piece
1) Cut the two pieces along the dotted lines.
2) Using the front doll piece as a guide cut two pieces out of warm and natural or batting.
3) Place the two doll pieces wrong sides together and then insert the warm and natural or batting pieces in between the two pieces and pin along the sides to hold.
4) Trim the edges so the pieces and warm and natural or batting outer edges are even.
5) Blanket stitch 1/8” - 1/4” away from outer edges with 6 strands of color coordinating DMC embroidery floss.
6) Add a hanger to the top of the piece with 6 strands of color coordinating DMC embroidery floss.
Copyright © 2004-2015 Linda Walsh Originals—Designs by Linda Walsh - Kit and Contents For Personal Use Only.

↧
Patience Is A Virtue Bunny Cut and Sew Kit and Handmade Ornaments Sets

Patience Is A Virtue Bunny Cut and Sew Kit - Creates Six 2" by 2" Cotton Fabric Bunny Doll Ornaments
To buy our cut and sew Patience Is A Virtue Bunny doll ornaments kit please CLICK HERE.
To buy our handmade machine and blanket stitched edge cut and sew Patience Is A Virtue Bunny handmade doll ornaments please CLICK HERE.
Cut and Sew Kit Contents: Six (6) pieces, as shown above, consisting of our Patience Is A Virtue Bunny cut and sew cotton fabric piece designs and instructions for finishing the ornaments one of two different ways.Kit DOES NOT include sewing thread, poly-fil, warm and natural or batting, and DMC color coordinated embroidery floss needed to create the ornaments one of two different ways.
Instructions included for finishing the ornaments via machine stitching as shown in the picture at the top of the collage shown above. Kit does not include poly-fil, sewing thread, and color coordinated DMC embroidery floss that you will need to buy to finish the cut and sew ornaments.
Or, blanket stitch embroider the edges of the ornaments as shown in the picture at the bottom of the collage shown above. Kit includes how-to tutorial for blanket stitching. Kit does not include warm and natural or batting, and color coordinated DMC embroidery floss that you will need to buy to finish the cut and sew ornaments this way.
The Patience Is A Virtue Bunny cut and sew kit contains 6 of the Patience Is A Virtue cotton fabric pieces.

Cut and Sew Kit Finishing Instructions Per Piece
Additional Supplies Needed -Poly-fil, Sewing Thread, and Color Coordinating DMC Embroidery Floss For The Hanger For Each Piece.
1) Cut the two pieces along the dotted lines.
2) Place right sides together and sew 1/8” away from outer doll line leaving a small opening on the bottom for turning.
3) Trim seam and clip edges.
4) Turn right side out and stuff with poly-fil.
5) Hand sew small opening closed with the sewing thread.
6) Add a hanger to the top of the piece with 6 strands of the color coordinating DMC embroidery floss.
Copyright © 2004-2015 Linda Walsh Originals—Designs by Linda Walsh - Kit and Contents For Personal Use Only.
Alternative Method #1 For Blanket Stitch Finishing Each Piece Along The Edges:
Additional Supplies Needed - Warm and Natural or Batting, and Color Coordinating DMC Embroidery Floss For Each Piece
1) Cut the two pieces along the dotted lines.
2) Using the front doll piece as a guide cut two pieces out of warm and natural or batting.
3) Place the two doll pieces wrong sides together and then insert the warm and natural or batting pieces in between the two pieces and pin along the sides to hold.
4) Trim the edges so the pieces and warm and natural or batting outer edges are even.
5) Blanket stitch 1/8” - 1/4” away from outer edges with 6 strands of color coordinating DMC embroidery floss.
6) Add a hanger to the top of the piece with 6 strands of color coordinating DMC embroidery floss.
Copyright © 2004-2015 Linda Walsh Originals—Designs by Linda Walsh - Kit and Contents For Personal Use Only

↧
Mattel Disney Pixar CARS Diecast: Sally with Tattoo Preview
Thanks for the great pics, “John H.” Sally with Tattoo is apparently taboo in the US … hard to find so “John H.” went to the great white north (well, from the weather report this week, it’s already a wintery vortex). Unibody Sally. Nice new sharp mold. Different expression and mouth from Sally with Cone […]
↧
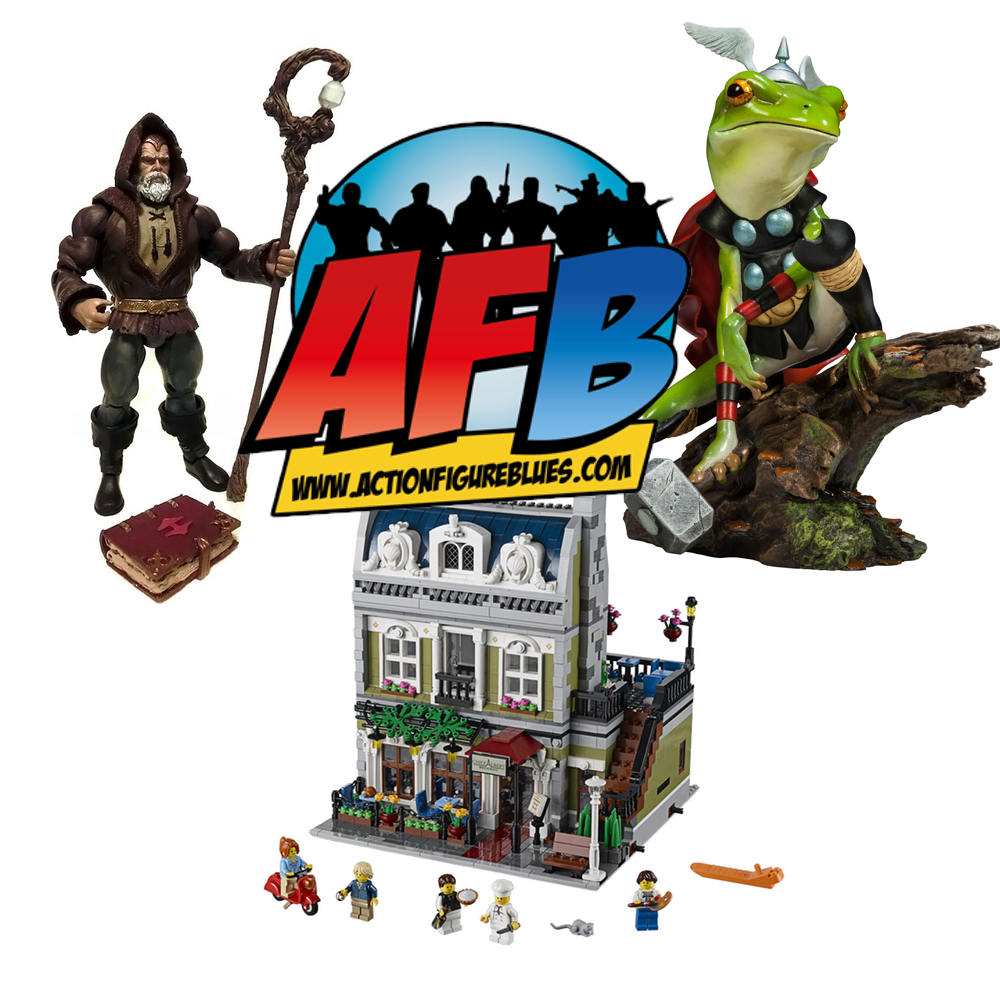
The AFB Podcast Episode 143: Sideshow Thor Frog, Lego Parisian Restaurant, MOTUC Eldor
Episode 143 of the AFB Podcast is live at iTunes and is now available for direct download! Download and subscribe to the podcast at iTunes now!
This week, join Ben, Adam, and Justin for all of the latest news and reviews!
This week we have three Toys of the Week:
This week we have three Toys of the Week:
- The Thor Frog Statue from Sideshow Collectibles
- The MOTUC Eldor Figure
- The Parisian Restaurant Set from Lego
If you don't use iTunes, you can download Episode 143 here now! Click on the link to listen, or right click to save the file! The podcast will always be available from the “Podcast” tab here - but if you can subscribe and give us positive ratings at iTunes, that will help us greatly!
The AFB Podcast is also on Stitcher Radio!
The AFB Podcast is also on Stitcher Radio!
Have a listen, and please give us some feedback at podcast@actionfigureblues.com - we might even read out your feedback on the next show!
Happy listening!
News Covered in this Episode
![]()
News Covered in this Episode
↧
↧
set database: LEGO 610 super wheel toy Canada version
set database: LEGO 610 super wheel toy Canada version
![]()
![]()
![]()
![]()
![]()
![]()
![]()
![]()
set number: 610

image courtesy of bricklink

image courtesy of lugnet

image courtesy of LEGO Historian


image courtesy of friedi1959
set name: super wheel toy Canada version
theme: Samsonite
year: 1965
pieces: 304
price: us$10
minifig: none
nice Samsonite set.
Canada version with long box.
come with basic bricks, wheels and specialty bricks.
can be built into vehicles.
released similar as 610 super wheel toy US version and 1610 super wheel toy Sears exclusive by LEGO in 1965.
great playability.
overall design is great.

↧
What's Shipping For The Week Of November 26, 2014

↧
FAA Still searching out regulations for Drones
Drones are aircraft and therefore should be regulated by the Federal Aviation Administration, the National Transportation Safety Board said this week in its long-awaited decision on a 2011 drone incident at the University of Virginia involving Raphael Pirker.
↧
More Pages to Explore .....


